HAL INITIALIZATION FAILED error in Windows 10/11
- If a certain driver is outdated or not compatible with your OS, you’ll encounter a HAL_INITIALIZATION_FAILED Windows 10 error.
- The HAL INSTALLATION FAILED error can also occur due to malfunctioning of unproperly connected hardware components.
- One of the best solutions to fix this problem is to use dedicated third-party repair software.
- The HAL INITIALIZATION FAILED stop code can also be fixed by updating the drivers.

There are all sorts of errors on Windows 10, but Blue Screen of Death errors are probably the most problematic.
These errors will constantly restart your computer in order to prevent damage, and that can be rather tiresome.
Since these errors are so serious, today we’re going to show you how to fix HAL INITIALIZATION FAILED error. We have to mention that our solutions also cover the VMware HAL INITIALIZATION FAILED issue.
How can I fix the HAL INITIALIZATION FAILED BSoD error?
- Use third-party repair software
- Check if your drivers and Windows 10 are up to date
- Run the BSOD Troubleshooter
- Run the SFC scan
- Run DISM
- Check the hard drive
- Check for problematic software
- Set UsePlatformClock to true
- Update your BIOS
- Reset Windows 10
- Check your hardware
1. Use third-party repair software
BSoD errors are not to be treated lightly as they can disturb all your workflow and can consume time and effort to fix.
However, there is an easier way to deal with them and especially with the HAL INITIALIZATION FAILED error. That is by using specialized software that can fix such errors automatically and quickly repair the system.

Restoro is powered by an online database that features the latest functional system files for Windows 10 PCs, allowing you to easily replace any elements that can cause a BSoD error.
This software can also help you by creating a restore point before starting the repairs, enabling you to easily restore the previous version of your system if something goes wrong.
This is how you can fix registry errors using Restoro:
- Download and install Restoro.
- Launch the application.
- Wait for the software to identify stability issues and possible corrupted files.
- Press Start Repair.
- Restart your PC for all the changes to take effect.
As soon as the fixing process is completed, your PC should work without problems, and you will not have to worry about BSoD errors or slow response times ever again.
⇒ Get Restoro
Disclaimer: This program needs to be upgraded from the free version in order to perform some specific actions.
2. Check if your drivers and Windows 10 are up to date
Many BSoD errors are caused by hardware or software incompatibility, and in order to fix this issue, it’s crucial to update Windows 10 frequently.
Microsoft is bringing new features through Windows Update, but in addition to new features, there are also many fixes designed to fix any hardware and software incompatibilities that you might have.
To avoid any BSoD errors, and to keep your computer safe and stable, make sure to update Windows 10 as frequently as you can.
Downloading Windows 10 updates is important, but it’s also crucial that you update your drivers.
Drivers allow Windows 10 to better utilize your hardware, and if the certain driver is outdated or not compatible with Windows 10, you’ll encounter a HAL INITIALIZATION FAILED BSoD error.
To update your drivers, all you have to do is to visit your hardware manufacturer’s website, locate the device you wish to update, and download the latest drivers for it.
After downloading the latest drivers, the BSoD error should be resolved.
Few users reported that this BSoD error was caused by their graphic card driver, therefore be sure to update your graphic card driver first and then move to other drivers.
To be sure that the error is fixed, try to update as many drivers as you can.
Update drivers automatically
Searching for drivers on your own can be time-consuming. So, we advise you to use a tool that will do this for you automatically.
Using an automatic driver updater will certainly save you from the hassle of searching for drivers manually, and it will always keep your system up to date with the latest drivers.
3. Run the BSoD troubleshooter
- Open the Settings app.
- Go to the Update & Security section.
- Select Troubleshoot from the left pane.
- Select BSoD from the right pane and click on Run the troubleshooter.
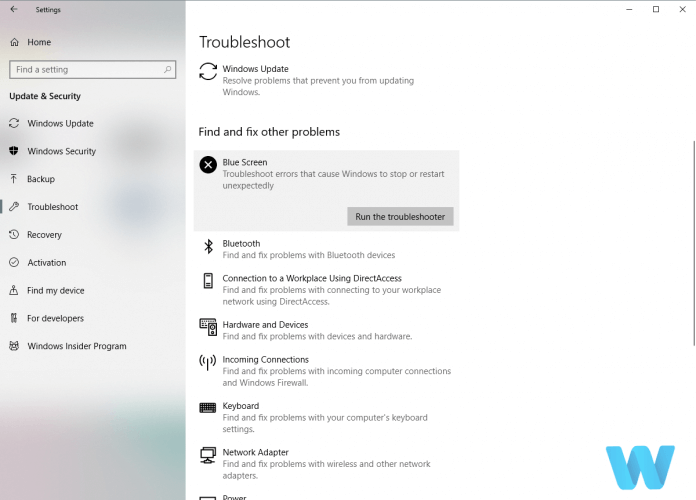
- Follow the instructions on the screen to complete the troubleshooter.
The next thing we’re going to try is running the built-in troubleshooter featured in Windows 10. This troubleshooter can help with all sorts of issues, including the BSOD errors.
So naturally, it could be helpful with resolving the HAL INITIALIZATION FAILED error, as well.
4. Run the SFC scan
- Go to Search, type cmd, and open the Command Prompt as administrator.
- Enter the following line and press Enter: sfc/scannow

- Wait for the scan to complete (it will take a while).
- The tool will automatically resolve the problem, if possible.
- Close Command Prompt and restart your computer.
Another troubleshooter that could be helpful here is the SFC scan. This is a command-line tool that scans your system for potential flaws, and resolves them, if possible.
So, it could also resolve the HAL INITIALIZATION FAILED error.
5. Run DISM
5.1 Run DISM the standard way
- Open the Command Prompt as shown in the previous step.
- Paste the following command and press Enter:
DISM /Online /Cleanup-Image /RestoreHealth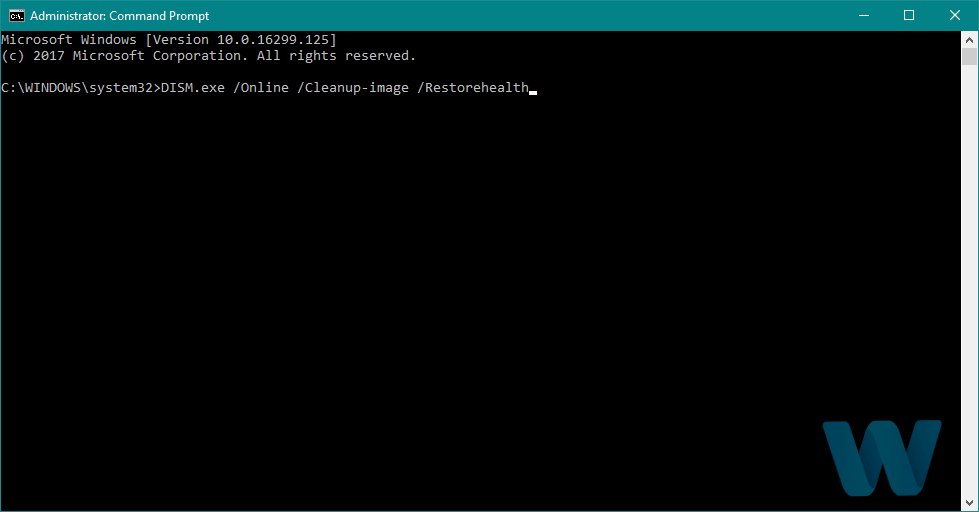
- Wait until the scan is finished.
- Restart your computer and try updating again.
5.2 Run DISN using a Windows installation media
- Insert your Windows installation media.
- Start Command Prompt as shown in the previous solution.
- In the command line, type the following commands and press Enter after each:
dism /online /cleanup-image /scanhealthdism /online /cleanup-image /restorehealth
- Now, type the following command and press Enter:
DISM /Online /Cleanup-Image /RestoreHealth /source:WIM:X:SourcesInstall.wim:1 /LimitAccess
- Make sure to change an X value with the letter of the mounted drive with Windows 10 installation.
- After the procedure is finished, restart your computer.
And the third troubleshooting tool we’re going to use while trying to resolve the HAL INITIALIZATION FAILED error is DISM.
Deployment Image and Servicing (DISM), as its name says, re-deploys the system image, so it’s possible it will also resolve some potential issues along the way.
We’ll walk you through both standard and the procedure that utilizes the installation media above.
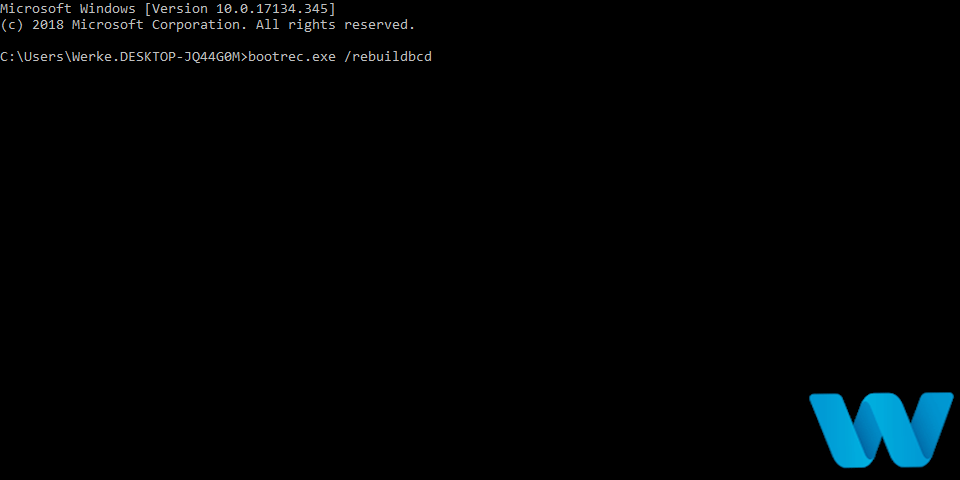
6. Check the hard drive
- Enter the Advanced Startup (Restart your computer while holding the Shift key).
- Go to Troubleshoot > Advanced Options.
- Select Command Prompt from the list of options.
- When Command Prompt appears, enter the following lines and press Enter after each line:
- bootrec.exe /rebuildbcd
- bootrec.exe /fixmbr
- bootrec.exe /fixboot
- bootrec.exe /rebuildbcd
- Some users are also suggesting that you need to run additional chkdsk commands as well. To perform these commands, you need to know drive letters for all your hard drive partitions. In Command Prompt you should enter the following (but remember to use the letters that match your hard drive partitions on your PC):
- chkdsk /r c:
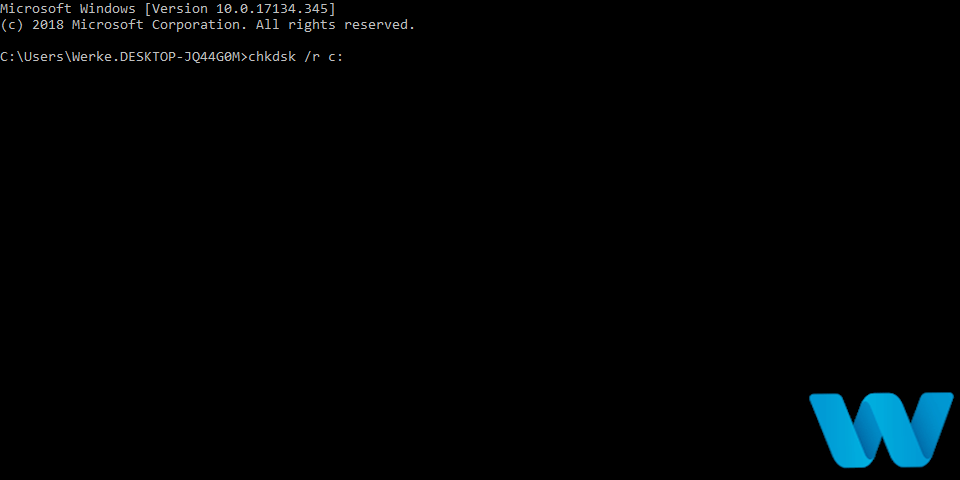
- chkdsk /r d:
- This is just our example, so keep in mind that you have to perform chkdsk command for every hard drive partition that you have.
- chkdsk /r c:
6. Restart your computer and check if the issue is resolved.
A broken hard drive is alarming. And the first warning messages come in the form of BSoD issues. So, go and check the current state of your hard drive.
To do that, you should run the chkdsk command. This command will scan your partitions, and apply solutions, if possible.
7. Check for problematic software
Often these types of problems can be caused by problematic software. And in order to fix HAL INITIALIZATION FAILED error, you’ll need to find the program that is causing this problem and disable/uninstall it.
Most commonly these types of errors are caused by your antivirus software, so be sure to uninstall your antivirus software.
If you’re concerned about your safety, you should know that Windows Defender will turn on automatically after you uninstall your antivirus program, so your PC won’t be without any protection.
It’s worth mentioning that almost any antivirus program can cause this error, so be sure to remove any third-party antivirus that you have installed.
In addition, in order to completely remove a certain antivirus, including registry entries and all files, it’s recommended to use a dedicated PC cleaning tool to analyze and remove junk files.
Many antivirus companies offer uninstaller tools for their software, so be sure to download them and use them.
However, sometimes there are files that are left behind after the installation and that can lead to other problems with your system and take up precious space.
The best way of wiping up an app is by using specialized software and CCleaner is perfect for this job. Not only that it will uninstall the app but it will delete any records from the registry and any other leftover files.
⇒ Get CCleaner
8. Set UsePlatformClock to true
8.1 Use Command Prompt
- Open Command Prompt as shown in step 4.
- Once the Command Prompt opens, enter the following and press Enter to run it:
bcdedit /set useplatformclock true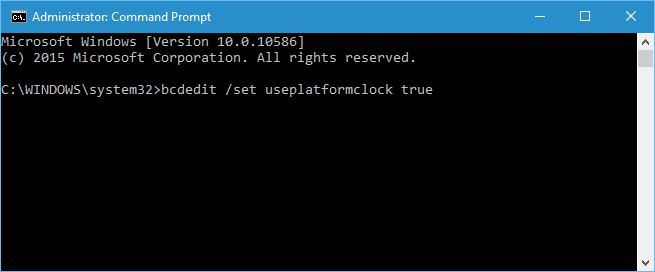
- Close Command Prompt.
Users reported that performing the aforementioned steps fixed the BSoD error while waking up from Sleep Mode, so if you’re having a similar problem, be sure to try the steps above.
If you cannot access Windows 10 due to this error, you can try performing these steps from Safe Mode. To enter Safe Mode, follow the next steps.
8.2 Enter Safe Mode
- Restart your computer a few times while it boots. This should start Automatic Repair process.
- Choose Troubleshoot, select Advanced options, click on Startup Settings and click Restart.
- When your computer restarts you should see a list of options. Select Safe Mode with Networking by pressing 5 or F5.
- Once the Safe Mode starts, try running Command Prompt and performing the steps from the 8.1 solution.
9. Update your BIOS
Few users reporting that updating BIOS fixed the HAL INITIALIZATION FAILED error.
Updating BIOS is an advanced procedure, and if not performed properly it can permanently damage your motherboard, so be extra careful. To see how to properly update your BIOS check your motherboard manual.
As for the necessary files, you can download the latest BIOS from your motherboard manufacturer’s website.
10. Reset Windows 10
- Reset your computer a few times while it boots.
- Choose Troubleshoot, select Reset this PC and click on Remove everything.
- Now select Only the drive where Windows is installed and click on Just remove my files.
- Follow the instructions and wait for the reset process to finish.
If the problem persists even after Windows 10 reset, it means that the issue is most likely caused by a faulty or incompatible hardware.
If the problem is caused by a certain software, you can fix it by performing Windows 10 reset.

NOTE
Resetting Windows 10 will delete all files from your C drive, so be sure to create a backup.
11. Check your hardware
HAL INITIALIZATION FAILED can be often caused by incompatible hardware, therefore if you installed any new hardware recently, be sure to remove it or replace it and see if your PC works better without it.
If you didn’t install any new hardware, you might want to check if your hardware is working properly.
A most common cause for BSoD errors is your RAM, so be sure to test your RAM modules one by one.
In addition, you can also use tools such as MemTest86+ to check your RAM. If your RAM is not the problem, check your hard drive, graphics card, and motherboard.
Almost any hardware component can cause this error, so you’ll need to perform a thorough inspection.
HAL INITIALIZATION FAILED BSoD error can be problematic, but as you can see, this error can be relatively easy to fix if you use one of our solutions.
If you suceeded in fixing this BSoD error by using one of our solutions let us know in the comments section below.